5-Step Remedy to 99.9% of marijuana Growing Problems
Beginner’s Guide & Solutions to Growing Marijuana/Cannabis
Arm yourself with the knowledge of the following 5 simple things to check when your plants get sick, and you’ll know how to give your plants a 100% recovery.
Step 1: Verify Watering Habits & Root Health
Step 2: Diagnose Nutrient Problems & Deficiencies
Step 3: Check Environment
Step 4: Identify Light Issues
Step 5: Diagnose Pests (sometimes you never actually see the bugs)
These tips were specially made to fix a whole host of possible issues with minimal work.
Catching and solving problems quickly means bigger, bulkier, more potent buds. Your cannabis plants will love you for it!
Step 1: Verify Watering Habits & Root Health

The roots are the heart of your cannabis plants. When roots become sick, the health of the entire plant quickly falls apart.

Drooping or wilting is the main symptom of watering or root problems. Plants droop when they have “wet feet” for too long, if they get too dry between waterings, or if their roots get sick.
Yet sometimes, cannabis plants with unhappy roots show no signs that there are problems until things become grim. Luckily, it’s easy to check for issues and even easier to solve them once you know what to do.
Watering and root problems can also cause a variety of other symptoms including yellowing, nutrient deficiencies, leaf spots, brown edges, curling, and more.

What to do? Use the checklists below to diagnose whether your plant is over-watered, under-watered, or has a root problem.
Check for signs of under-watering
Overwatering is easily the most common growth problem, but it can be tricky to diagnose. Go through this list carefully and if you suspect overwatering, check the link below to see pictures and get detailed solutions.
- Plants seem droopy (at least some of the time) or wilted
- Plants seem better right after getting watered
- Nutrient deficiencies appear even though you’re on top of nutrients and pH
- Dark green coloring
- Slow growth
- Grow medium looks dry or dusty
- Grow medium is very airy and drains quickly
- The plant feels very light for its size (this means there’s not much water in the growing medium)
Check for signs of under-watering
- Plants seem droopy (at least some of the time) or wilted
- Plants seem better right after getting watered
- Nutrient deficiencies appear even though you’re on top of nutrients and pH
- Dark green coloring
- Slow growth
- Grow medium looks dry or dusty
- Grow medium is very airy and drains quickly
- The plant feels very light for its size (this means there’s not much water in the growing medium)

Root Rot
- Roots can get mushy and “rot” in a growing medium that stays really wet for a long time, though typically root rot happens in a hydroponic setup
- The main symptom is brown or smelly roots
- Plants display symptoms very similar to over and under-watering (deficiencies, discolored leaves, drooping, etc.)

In hydroponics, root health is key to success. React quickly if you noticed roots look brown or unhealthy
Tips for healthy roots
- Start with a great growing medium including super soil, good potting soil, coco, or hydro. Don’t use dirt you find outside or low-quality potting mixes.
- Water potted plants properly! Make sure water can drain freely from potted plants, and don’t water too often. Learn how to water potted cannabis plants so you never run into problems.
- Make sure that roots get plenty of oxygen. With potted plants, the growing medium should be relatively loose as opposed to dense. Roots need oxygen to stay healthy. If you have a thick grow medium, mixing in some perlite is an easy way to adds more pockets of air. In a hydroponic setup where the roots are growing directly in water, the more bubbles the better (up to a point), as this dissolves lots of oxygen directly in the water. Water that is at a lower temperature can also hold more oxygen than water at a higher temperature. That means controlling the temperature is extra important in a hydroponics setup.
- If you’re using a non-standard growing medium (anything besides soil, coco coir, hydro, etc.), know how to take care of your plants in their growing medium. For example, it can be difficult to grow cannabis in something like straight perlite unless you maintain a water reservoir because perlite can not hold any water. Straight Rockwool is bad for the opposite reason, it holds onto a lot of water and not enough air.
- Your plant roots cannot be allowed to dry out or sit in stagnant water. Roots need a good mix of both moisture and oxygen for the fastest growth
- Add a root supplement to your water to encourage healthy roots.
Step 2: Diagnose Nutrient Problems & Deficiencies
Cannabis nutrient problems are often closely related to the pH at the roots of your plants. That’s because when the root pH is off, it can cause your plant to show signs of a nutrient deficiency, even if the nutrients are actually there in the soil. Even if you’re providing nutrients, plants may get nutrient deficiencies if the pH is off.
This magnesium deficiency is the result of the pH being too low at the roots.

Growers need to monitor their root pH in almost all growing setups for the best results. Cannabis plants prefer a slightly acidic root environment. Some growers get lucky and the pH of their water happens to be just right without additional adjustment or monitoring. Yet most growers will achieve better growth and plant health by monitoring pH. Being aware of your pH helps you understand when things are going wrong. Luckily, nutrient and root pH problems are easy to solve with the right information.
Cannabis plants cannot absorb nutrients properly if the pH at their roots is too high or too low. So even if the nutrients are present, you’ll still get what looks like nutrient deficiencies if you don’t maintain the right pH.
This copper deficiency is the result of bad pH even though the plant was getting nutrients in the water.

For those of us who aren’t lucky enough to magically have the right pH, here’s how to ensure your plants get exactly what they need.
What to Do? The goal is to give your plant exactly the kind of nutrients it needs to thrive and provide the correct pH at the roots so your plants can properly absorb nutrients.
- If you are providing your plants with nutrients, check your nutrients to make sure they have all the necessary elements and minerals for proper growth.
It’s important you learn a little bit about what kind of nutrients are needed by the cannabis plant during different stages of growth. These days, there are lots of nutrient systems available that are specifically formulated for plants like cannabis, and they help take all the guesswork out and give your plants exactly the nutrients they need. It doesn’t have to be expensive to provide everything your cannabis plant needs!
- Even if you are providing your plants with the correct amount of nutrients, you still need to monitor and adjust the pH to prevent nutrient deficiencies.
Once you’re positive you’re watering correctly, providing the nutrients your cannabis needs, and you’ve adjusted the water pH to the proper levels, nutrients problems should start clearing up quickly. Remember, if leaves get damaged from a nutrient problem, it is unlikely that a particular leaf will ever recover and turn green. What you’re looking for is that the problem stops spreading and that any new growth appears green and healthy.
Step 3: Check Environment
If you’ve ruled out problems with watering, nutrients, and pH, there’s a strong chance something with the environment is causing your symptoms.

A good growing environment is crucial to the health of your plants. When the temperature (and to a lesser extent the humidity) is too high or too low, your plants will not grow properly no matter what else you do. Plants seem unhealthy and buds just don’t fatten up. You may also end up with problems related to plant stress such as hermies.

Too much heat (or arid conditions) will generally sap the strength of your plant and force it to drink more water than normal for plant transpiration (the process of water movement through a plant and water evaporation through leaves, stems, and flowers). A plant drinking more water than usual can have unexpected consequences. Sometimes hot, dry temps can cause unexpected nutrient burn (plant tips curl or turn brown from high levels of nutrients) because your plant is absorbing more nutrients than normal at the roots, alongside the extra water.

If there is a particular source of heat that is harming the plant (like a hot grow light), you’ll know because the leaves closest to the source of the problem will wilt and turn a brownish color.
A generally too-hot environment can cause the stems of your plant to droop as if under or over-watered, even when there’s plenty of water at the roots.
Plants that suffer from extreme heat stress for too long may not recover and sometimes are unable to straighten their posture and continue growing.
Heat stress dramatically slows down growth and buds don’t fatten as much as they could

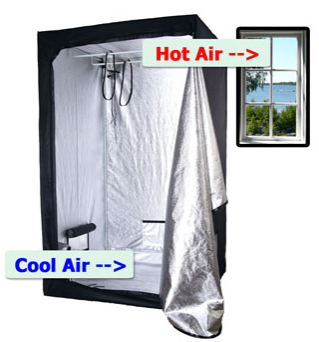
One of the reasons you need great air circulation is your plants “breathe” CO2 during the light hours, almost like we breathe oxygen. Unless your plants are in a big open space with lots of air, or you are supplying your plants with CO2, you need to have some sort of exhaust system to pull away from hot, stale air and bring in new fresh air for your plants.
If you’re worried about the smell of cannabis, make sure any heated air being vented outside grow room/house gets filtered to remove the scent of cannabis. For example, many growers choose to get a carbon scrubber to “scrub” all odors before the hot air is vented. By creating good suction with an efficient exhaust system and adding a carbon scrubber, you can basically eliminate all smells from the grow room, inside and outside of the house.
An exhaust system doesn’t have to be anything fancy. At its simplest, an exhaust system can be two holes and a fan (with the fan place in one of the holes pointed out from your grow area). Having a fan constantly pulling hot air out and bringing fresh air in from your intake hole will help ensure that your plants have the fresh air they need.
Because your plants need CO2 when the lights are on in order to function properly, a completely sealed off grow box is not good unless you’re artificially adding CO2. Your plants will suffer if they don’t get enough CO2 in a sealed grow box even if the temps are completely under control.
Some growers like to supplement their plant with extra CO2 in an attempt to increase yields or growth rate, but it’s important to note that the amount of CO2 found in regular air is plenty for your plants unless you have extremely powerful grow lights (1000W HPS, high power LEDs, etc).
For most growers, a proper exhaust system and a few strategically placed fans are all you need when it comes to air circulation.
Watch Your Humidity, too! Very high or low humidity can cause slow growth, though high humidity may be worse because it can also trigger white powdery mold and bud rot.

Humidity is a term used to describe the amount of water vapor present in the air at any given place, and the amount of water in the air is related to the local temperature.

Humidity measures the amount of water in the air. Humidity between 40-60% RH works great in most situations.

It is common for new growers to not pay attention to humidity at all, and this can sometimes cause otherwise unexpected and/or inexplicable problems.
Cannabis plants can show false signs of nutrient deficiencies when the relative humidity of the grow area drops below 35% RH, especially when things get really dry. Younger plants are most susceptible, though plants often adjust over time many plants are able to grow just fine as long as they’re provided with plenty of water at the roots. Some strains can handle low humidity better than others.
Extremely low humidity can cause plants to grow slower and less healthy.
Young plants, new clones, and vegetating plants that are used to more humid conditions are usually the hardest hit by a dry spell.

In the flowering stage, humidity should be kept below 55% to prevent the chance of mold and increase resin production.
Younger plants usually are fine with high humidity, but humidity is especially dangerous in the flowering stage because the insides of the buds can grow mold and still look fine from the outside at first.
High humidity in the flowering stage causes bud rot, which quickly spreads from plant to plant and can ruin an entire harvest overnight. The leaves on this bud became discolored overnight.

When you look closer, you can see the entire inside has started molding and rotting. This entire bud had to be tossed, and the rest of the plant was harvested immediately before it kept spreading.
In addition to preventing bud rot, there’s some evidence that maintaining a low humidity environment in the flowering stage helps buds produce more terpenes (giving buds a stronger natural scent) and more trichomes (possibly even increasing the potency of your buds!).
What to Do? Get a temperature and humidity monitor. Control heat by whatever means necessary and keep humidity in check using the steps outlined below.
Monitor the temperature and humidity with a thermometer/hygrometer in your grow space.
Regardless of your setup, it’s important for air to be moving around your plants to prevent heat spots, strengthen stems, help stop pests, reduce the chance of mold, and make sure your plants are getting plenty of fresh CO2 to achieve the best growth.
When it comes to fans, don’t point fans directly at plants or they may get windburn. Usually, it’s better to be point fans at a wall to disperse the air or have fans blowing over and under the plant canopy. A fan circulates air in the room and provides a gentle breeze for your plants.
The best-case scenario is you want to set up your fan system so that all the leaves on the plant are gently rustling, yet no stems or branches are waving around from the force of the wind.
When the humidity is too low, it’s important to make sure you provide plenty of freshwater to your plants at all times. You may need to reduce the total amount of nutrients as the plants will drink more water and therefore absorb more nutrients through their roots than when the humidity is not as dry.
When it comes to controlling humidity indoors, you may need to use a humidifier and/or a dehumidifier to keep the humidity in the optimal range. A humidifier adds moisture to the air while a dehumidifier takes moisture out.
Controlling your grow room humidity is one of the tricks that separates the expert growers from the beginners.
You can get some pretty fancy humidity gauges to place in your grow room, and products to help change the humidity are commonly found at department stores, hardware stores, or most stores that sell home appliances.
Here are the most important things to keep in mind when it comes to the humidity of your cannabis grow room.
- Vegetative stage: it’s good to aim for the humidity of 40-60% during the vegetative stage
- Flowering stage: humidity should be below 55% (around 45-50% is ideal) during the flowering stage to prevent bud rot, help buds grow denser, increase resin production, and cause your plant to produce more terpenes (the stuff that makes your buds smell great). However, lowering the humidity below 40% RH (especially with a plant that’s used to higher humidity) can increase the chance of your plant running into problems or deficiencies.
With the right tools, the task of maintaining humidity can be close to automated, and you will see huge benefits compared to the amount of time and money you invest.
When the air feels moist or humid (or a humidity monitor alerts you to high humidity), it’s extra important to ensure that plants get plenty of air circulation and have lots of air movement. You also want to avoid letting leaves touch each other during periods of high humidity. You can fix constantly too-humid conditions with an exhaust system, fans, and possibly a dehumidifier.
If plants are very leafy and leaves are laying on top of each other, it dramatically increases the humidity of the grow space. In this case, removing leaves (defoliation) can help. Try to remove leaves that are in the lower/middle part of the plant, leaves that are covering bud sites, and leaves that are touching each other making wet spots.

When the air is too dry indoors, you can either choose to let your plants grow hardened to the arid air, or you can use something like a “swamp cooler” (evaporative cooler) to add humidity while also reducing the temperature of your room. A humidifier will also add humidity but tends to raise the humidity of the room.

Step 4: Identify Light Issues
Cannabis loves light! But not too much…
When growing cannabis, the mantra when it comes to lights is usually “More is better!” To be honest…it’s true! More light usually is better!

You see, light is like “food” for your Cannabis plants. When plants are growing very slowly, but aren’t showing signs of other problems, the cause is often that they aren’t getting enough light.
The amount of light you give your plants is strongly correlated with the fast your plants grow, as well as how many buds your plants will produce during the flowering stage.
Many new growers don’t realize they’re not giving their plants enough light. As a very general rule, you want at least 100W worth of electricity going into your indoor grow light to harvest a few ounces. More is often better.
More light = More yields + Faster Growth (up to a point)
If plants are growing very slowly, if they’re not drinking much water, or otherwise aren’t doing well without showing any other major signs of problems, often the problem is the plant simply needs more light to thrive.
As a very general and unscientific rule, a new grower who doesn’t run into major problems can expect…
- CFLs, T5s, and other fluorescent grow lights– Average harvest of 0.25-0.5g/watt
- HPS and LEDs– Average harvest of 0.5-1g/watt
- Average growers should expect a harvest on the lower side, an experienced grower can expect a harvest on the higher end (or more!)
This rule is referring to how many watts of electricity is actually being pulled out of the wall, not some sort of “equivalent” amount of watts. If an LED pulls 90W of electricity from the wall, you should plug that into the equation, not the claim that it’s “equivalent” to a 400W HPS light. Same for CFLs, if you have a CFL bulb that pulls 26W of electricity from the wall, you should count that as 26W, and ignore the fact that it says “equivalent to 100W” on the front.
Of course, this rule varies quite a bit depending on the type of light, the strain being grown, the size of the plants, etc. However, it’s a good general guide if you’re not sure how much light you need, and it can help you decide if you might not have enough light for your plants.
To put that into perspective…
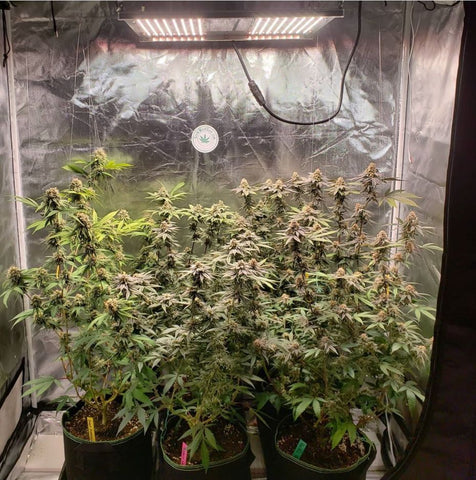
- A good 600W LED grow light will net the average grower about 300g or yield, or 10 ounces of dried bud
- A 600W LED grow light will net the experienced grower about 600g, or 20 ounces of dried bud
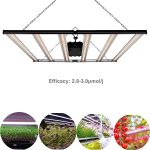
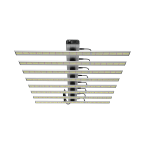
Highly Recommended LED grow light in that range: ES-GL600A01-YY (I love this light!)

Keep in mind that there are many other factors that go into this, and this is not a guarantee as much as a general rule. Moreover, many smaller lights tend to get better yields per watt than fewer larger lights. Lights that are kept closer to plants (without signs of light stress) will also tend to produce bigger yields and faster growth. Most importantly, the strain you start with and the training methods you use to get your plants to more efficiently use your indoor grow lights will have a huge impact on your growth rates and final yields.
But can there be too much light?
Yes, there can be too much light!
Unfortunately, more light is not always better. Cannabis plants can be fickle. You want to give them very bright light… but not too much light.
When Cannabis plants are young, they are weak and cannot tolerate much light at all. Yet as they get older, and especially in the flowering stage, Cannabis plants want almost all the light they can get.

The problem of too much light often occurs indoors, when your grow lights are too close to the plants. This essentially gives them their own version of sunburn.
Young plants, seedlings, and new clones are especially prone to suffering from too much light, though it can affect older plants too. The main way you know your plants are suffering from the light burn is if only the leaves closest to the lights are affected, and you’ve already covered all the other possible issues in this article.
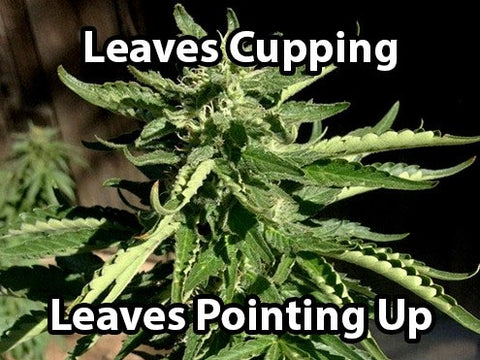
The intensity of a grow light that is too close will dry up a plant, cause bleaching/yellowing, turn the edges of its leaves brown and crispy, almost like nutrient burn, and other odd symptoms.
Too high light levels will cause light burn.

High-Pressure Sodium (HPS) lights have the meanest reputation for ‘light-stressing’ plants, but many of the newer, more powerful LEDs (Light Emitting Diodes) do it, too!
What to Do? Most importantly, pay attention to your plant and watch out for signs of light stress, which will only affect the parts of the plant closest to your grow lights.
For HPS, Metal Halide, and CFL grow lights, use the ‘back of your hand’ test.
Back of Your Hand Test – For MH, HPS, CFLs and T5 grow lights (not always effective for LEDs or very high-power HPS lights with strong air conditioning)
- Set up your grow lights and turn them on (make sure they’ve had time to warm up)
- Gently place your hand – palm down – right above the tallest part of your plant
- Wait 10-15 seconds
- If the heat coming from the light feels too warm for your hand, then it’s going to be too much light for your cannabis.
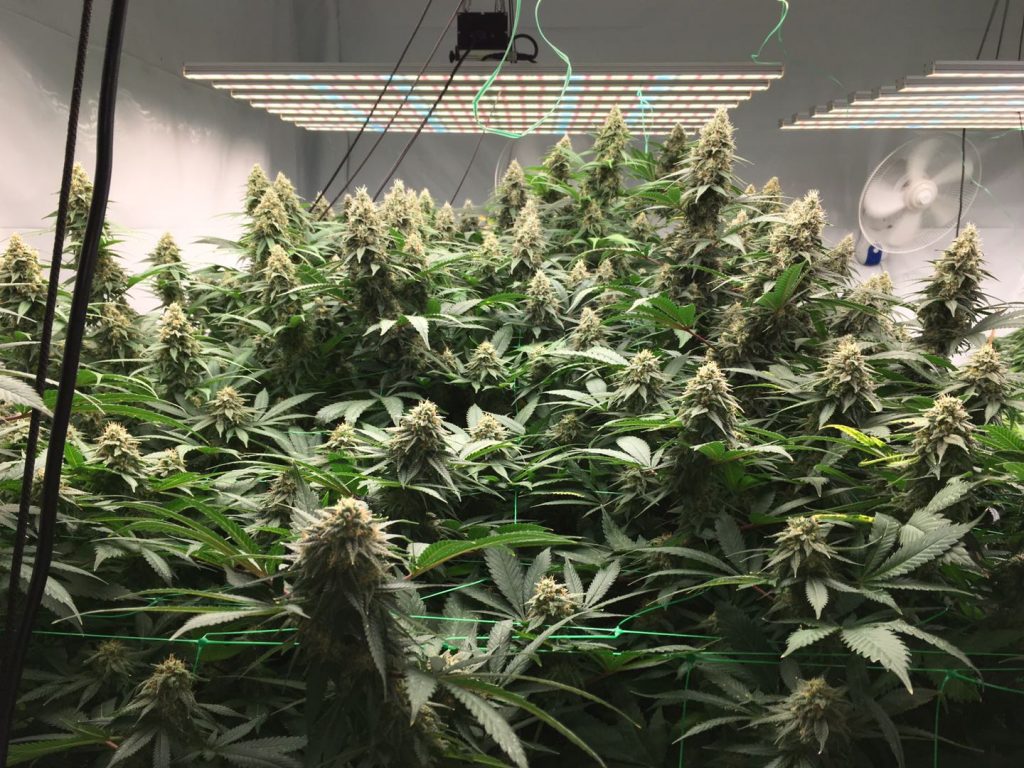
LEDs generate very little heat, but can still light-stress plants, so it’s best to keep LEDs the distance recommended by the manufacturer. Each grow light is different, so it’s hard to make generalizations, but just about every LED needs to be at least 10″ inches away from your plants. In my experience, most hobby-sized LEDs (100-300watt true power draw) need to be kept 18-24″ away in my experience. Some LEDs need to be kept even further away, up to 3 feet or more for some of the newer, extremely powerful LED models.
LED grow lights usually need to be kept at least 18-24″ away to prevent light burn.
Use caution when attempting to move your grow lights closer, and avoid moving them more than an inch closer in a day, so you can watch the plant’s reaction.
Make sure your grow space is light-proof! (Unless growing an autoflowering strain)
If you’re growing photoperiod plants, you also need to ensure your grow space is totally light-proof, so light can’t get into the tent when the grow lights are off. Photoperiod plants need complete darkness during their dark period or they’ll never make flowers. If photoperiod plants start getting light at night while budding, it can cause them to herm (buds get seedy) or re-veg (buds die, and the plant reverts back to the vegetative stage).
If you’re growing a photoperiod plant, light leaks can cause seedy buds

Or re-vegging (the main symptoms are rounded leaves on long stems and dying buds)

Step 5: Diagnose Pests (sometimes you never actually see the bugs)
When growing in soil, bugs are a common pest to Cannabis gardens. We believe that growing Cannabis in coco is often simpler for beginners because it automatically eliminates many of the bug problems growers run into when growing in the soil while achieving faster growth.

Sometimes you don’t see bugs. Thrips are an example of a pest that leaves markings on the leaves which can be mistaken for deficiencies, yet you rarely see the bugs themselves.

Broad mites are also commonly mistaken for other issues because the bugs are usually too small to see. Broad mites cause twisted growth and shiny, discolored leaves.

Cannabis russet mites “poop” out extra stuff at the top of the plant that can be mistaken for mold.

However, usually, you can tell when plants have bugs because you see the bugs themselves, or it actually looks like bites on the leaves.
What to Do? If you notice any signs of bugs or mold, don’t wait. Act quickly!
One of the worst types of pests for cannabis growers is spider mites. They actually have earned the nickname “the borg” because of their ability to seemingly come back from the dead and take over an entire grow room or destroy a whole crop.
Spider mites are another common pest. You can often see them moving under the leaves, or you’ll notice the webbing and bite marks.

Fungus gnats are another common cannabis pest. They look like tiny flies buzzing around the soil and are the result of overwatering.

Leafhoppers look pretty, but they munch on your plants so don’t ignore them!

When you believe you have bugs…
- The first step is to identify what type of bugs or pests you actually have
- The next step is treatment.
As mentioned earlier, good air circulation and a slight breeze are not only good for the plant by itself, but will also disturb bugs and make it harder for them to turn your plant into a home.
How to Grow Cannabis? Where Is Cannabis(Cannabis) Legal?
Can any led light be used as a grow light?
Where to buy a Super High-yield Cannabis Plants Grow Light?